leaf icon
leaf icon
leaf icon
calendar icon
Gardens To Visit
caret icon
Visit a PHS garden or landscape to help build stronger social connections with your community.
For Neighborhoods
caret icon
Explore programs that create healthy, livable environments and increase access to fresh food.
For Gardeners
caret icon
Engage with PHS on gardening, whether you’re an expert or a beginner.
About Us
caret icon
Get to know our story, become a part of our staff, or see what is in the news with PHS.
The Flower Show

How to Grow Potatoes in a Bag

June 05, 2025

leaf icon plant care

leaf icon gardening projects

Potatoes In A Bag

If you’ve got a smaller garden (or don’t have room for one!), food growing can seem daunting and inaccessible. However, there are plenty of foods that can grow in bags, like potatoes. If you’ve got a spot that gets a lot of sun (yes, even a patio or balcony will do), you can grow up to 15 pounds of fresh, delicious potatoes to enjoy -- without a real garden!    

Here’s your easy, step-by-step guide to growing potatoes in a bag! 

Supplies You'll Need to Grow Potatoes in a Bag

  • Seed potatoes (6 to 8 per bag) 
  • 50-quart burlap sack or fiber grow bag 
  • Coconut coir (a sustainable alternative to peat moss) 
  • Compost (bagged or homemade) 
  • Water 

Become a PHS Member to get exclusive access to GROW magazine and even more expert gardening guides, tips, and inspiration.

Step 1: Choose Your Seed Potatoes 

Start with certified seed potatoes from a garden center or mail-order supplier. These are free from disease and are not treated with anti-sprouting agents like grocery store potatoes often are. Fingerling varieties work especially well in containers because they are small, colorful, and flavorful. 

What are seed potatoes? They are simply potatoes with at least one “eye,” which is a dimple or sprout where new growth will form. You can use whole small potatoes or cut larger ones into chunks, making sure each piece has an eye. 

potatoes
Seed potatoes prepped and ready—each with at least one “eye” to sprout into a leafy plant.

Step 2: Mix Your Growing Medium 

Blend equal parts coconut coir and compost in a large tub or bucket. This creates a loose, nutrient-rich mix that holds moisture without becoming soggy. Add about 3 inches of this mix to the bottom of your grow bag and water until moist. 

soil blend
Start with 3 inches of your soil mix—compost and coconut coir create a light, nutrient-rich base.

Step 3: Add the Potatoes 

Place your seed potatoes on top of the base layer, spacing them apart to allow room for growth. Cover them with about 2 inches of the compost-coir mix and water again. 

potatoes in a bag
Lay potatoes flat in the bag, eyes up, with space between each for room to grow.

Step 4: Water and Wait 

Keep the soil evenly moist. In 1 to 2 weeks, green shoots will appear. Once they are a few inches tall, add more of the compost mix to cover the stems, leaving only the top leaves exposed. This encourages the plant to grow more tubers along the buried stems. 

potato sprouts
Just two weeks later—green shoots emerge!

Step 5: Hill as They Grow 

As your potato plants grow, continue adding compost mix every week or two, covering the stalks up to the lowest leaves. Keep going until your bag is full. 

Tip: Always keep developing potatoes covered with soil. If they are exposed to sunlight, they will turn green and become inedible. 

potato sprouts
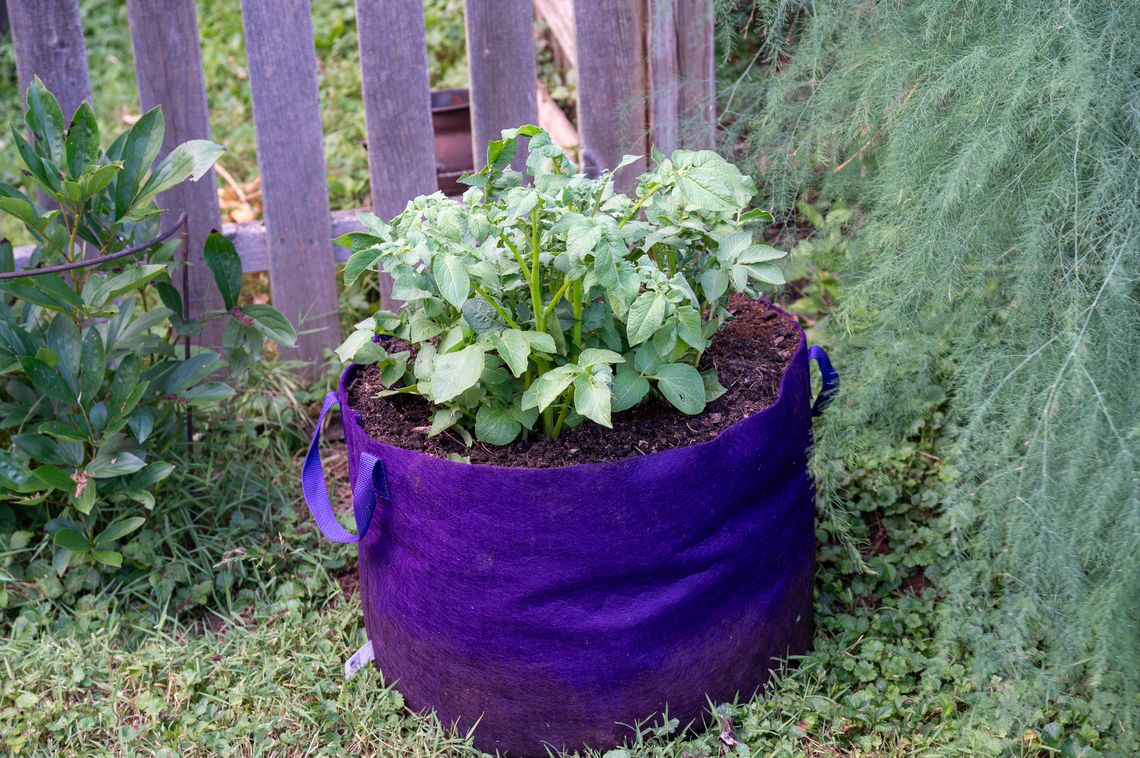
Add soil weekly as the plant grows, burying stems but keeping leaves above ground to encourage more tubers.

Step 6: Watch for Flowers 

In about 6 weeks, your potato plants will begin to bloom. This means they are forming baby potatoes underground. You can harvest them at this stage for tender “new” potatoes, but plan to eat them within a few days since they do not store well. 

flowering plant
Flowers are your sign that new baby potatoes are forming below the soil.

Step 7: Harvest Your Crop 

For full-sized potatoes, keep watering regularly until the plants naturally die back. The leaves and stalks will wilt and turn brown. Then it's time to harvest. 

Gently tip your grow bag on its side and pour out the contents. Dig through the soil with your hands to find your homegrown potatoes. 

Let them cure in a cool, dark, and well-ventilated place for a few days to toughen their skins. Brush off excess dirt but wait to wash them until you are ready to cook. 

harvest potatoes
From bag to bowl—your small space garden just yielded a big reward!

Bonus Tips for Growing Potatoes in a Bag: 

  • Start in early spring after the last frost. 
  • Rotate crops each season to help prevent disease. 
  • Try growing multiple varieties in different bags for more flavor and fun. 

This easy container method makes it possible to grow potatoes almost anywhere. It’s a satisfying, low-maintenance project with delicious results, perfect for new and experienced gardeners alike.  

Prefer a printable version? Download our PDF guide for easy reference while you plant, water, and harvest your potatoes!